
Nodes and Users
Manage Company
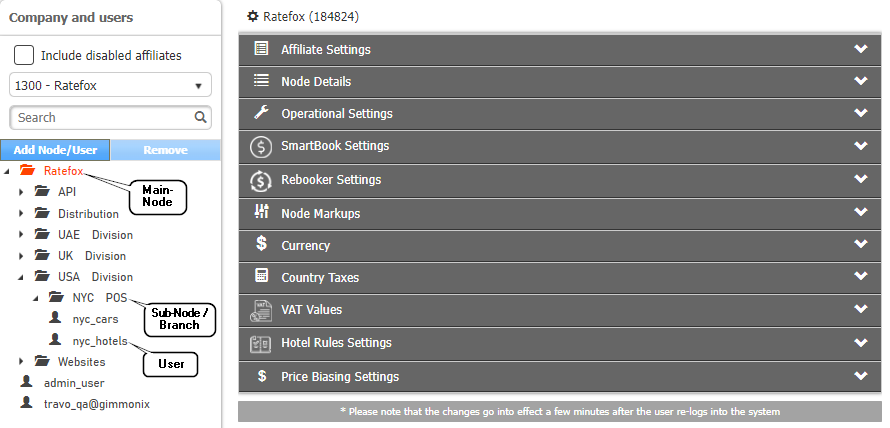
There are two main types of entities in the system - Nodes and Users.
- Node - represents an organizational entity which can be equivalent to a company, branch, brand/sub-brand, etc.
- User - is the actual point of sale - whether it's an API user or a travel agent.
Some system settings are applicable only on Nodes and some settings are applicable only on users.
- Client is the main node in a company’s hierarchy. A Client is normally the client i.e. a Company’s main Node.
Under an Client it is possible to create Sub-Nodes (company branches) and Users .
Users can be created based on their roles under the Client, under a Node or under a Sub-Node.
NOTE :A node inherits the following data from his parent node :
- Custom Settings.
- Node Markups.
- Credit Card Preferences.
- Obligo Settings.
- Advanced features i.e. Dynamic Markups, Auto-Rebook.
Creating a New Nodes
Node hierarchy may be required for monitory and operational purposes.
Create new node entities to differentiate between branches, departments, etc.
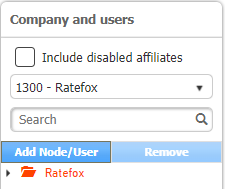
- On the Back-Office , click on "Manage Company" to open the Admin tab .
- The Company and Users screen is displayed .
- The highest node allowed for the user is automatically selected:
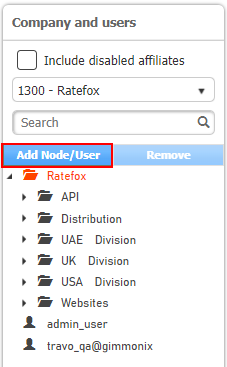
- Click the node under which you would like to create the new node, and click Add :
- Then the "Add Node" screen is displayed :
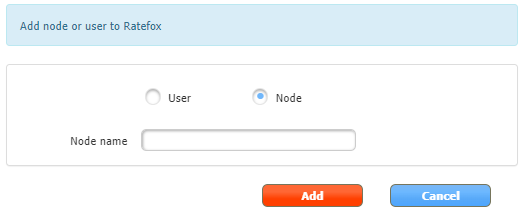
- Choose the "Node Name" , and click "Add" .
Creating a New Users
Create new users to differentiate between API users or agents .
- On the Back-Office , click on "Manage Company" to open the Admin tab .
- The Company and Users screen is displayed .
- The highest node allowed for the user is automatically selected:
- Click the node under which you would like to create the new User, and click Add :
- Then the "Add User" screen is displayed :
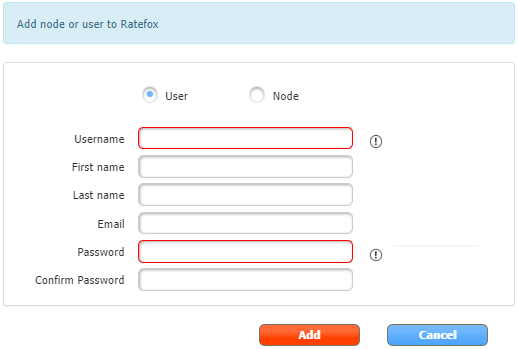
- Fill in the details , and then click "Add" .
- The 'user' will be created within the previously chosen Node .
Updated 2 months ago